WinSCP GUI vs the CLI
Here once again we’re going to have the two options, the CLI or the WinSCP GUI, I’m going to use the second option due to its simplicity but also include the correspondent CLI commands you should use if working with the terminal.
How to copy the Public SSH key to the remote server
As we have already discussed on this article the SSH public key must be copied to an specific file (authorized_keys) located on an specific folder (.ssh) located inside the user’s home directory, as it is dictated by the Global SSH settings file.
Ownership and permissions
Both the folder(.ssh)and the file (authorized_keys)must be configured to only allow the current user to be able to use them, proper ownership and permissions are the key here.
WinSCP quick copy, It’s a kind of magic!
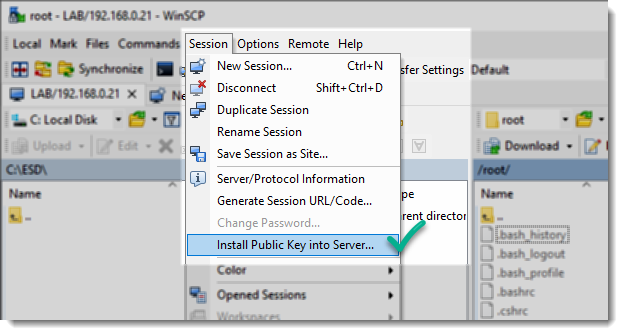
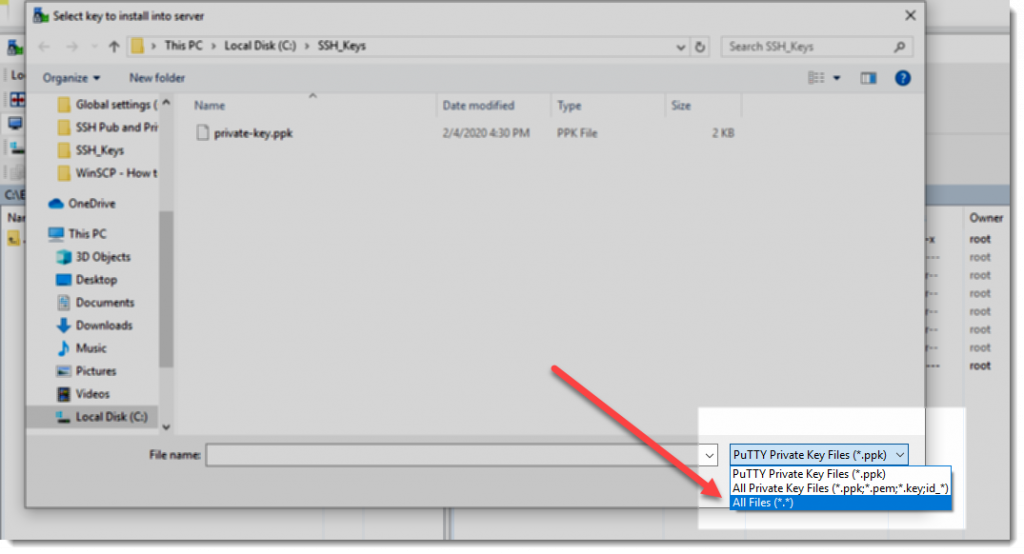
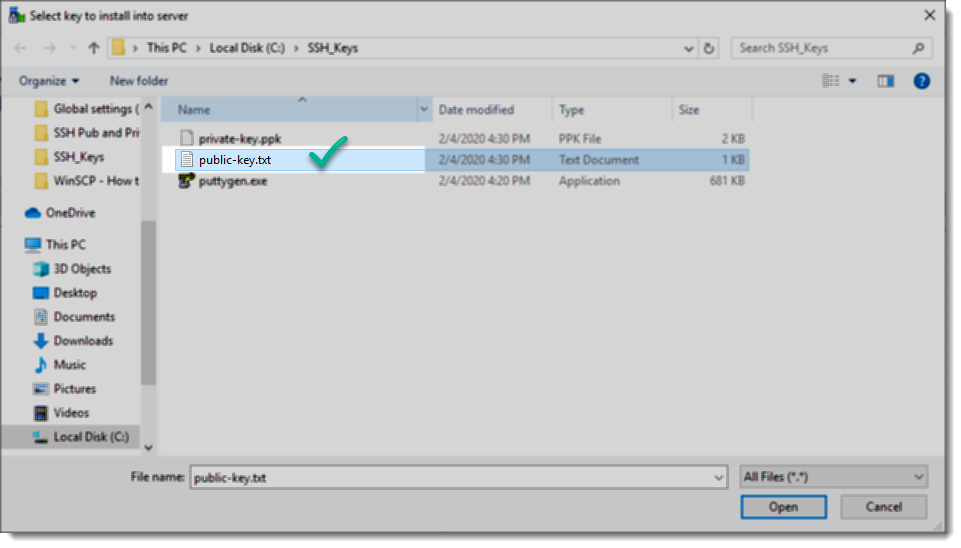
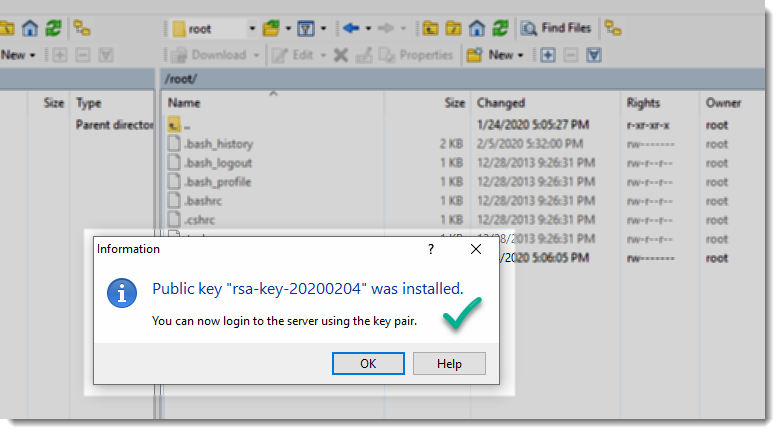
As I told you before, WinSCP is way more simple completing this task than using the CLI, the following animation shows how fast this process can be, by default no user has the folder “.ssh” nor the file “authorized_keys” it is your job to create them and to set them properly, or let WinSCP to do everything for you, let him do its magic!
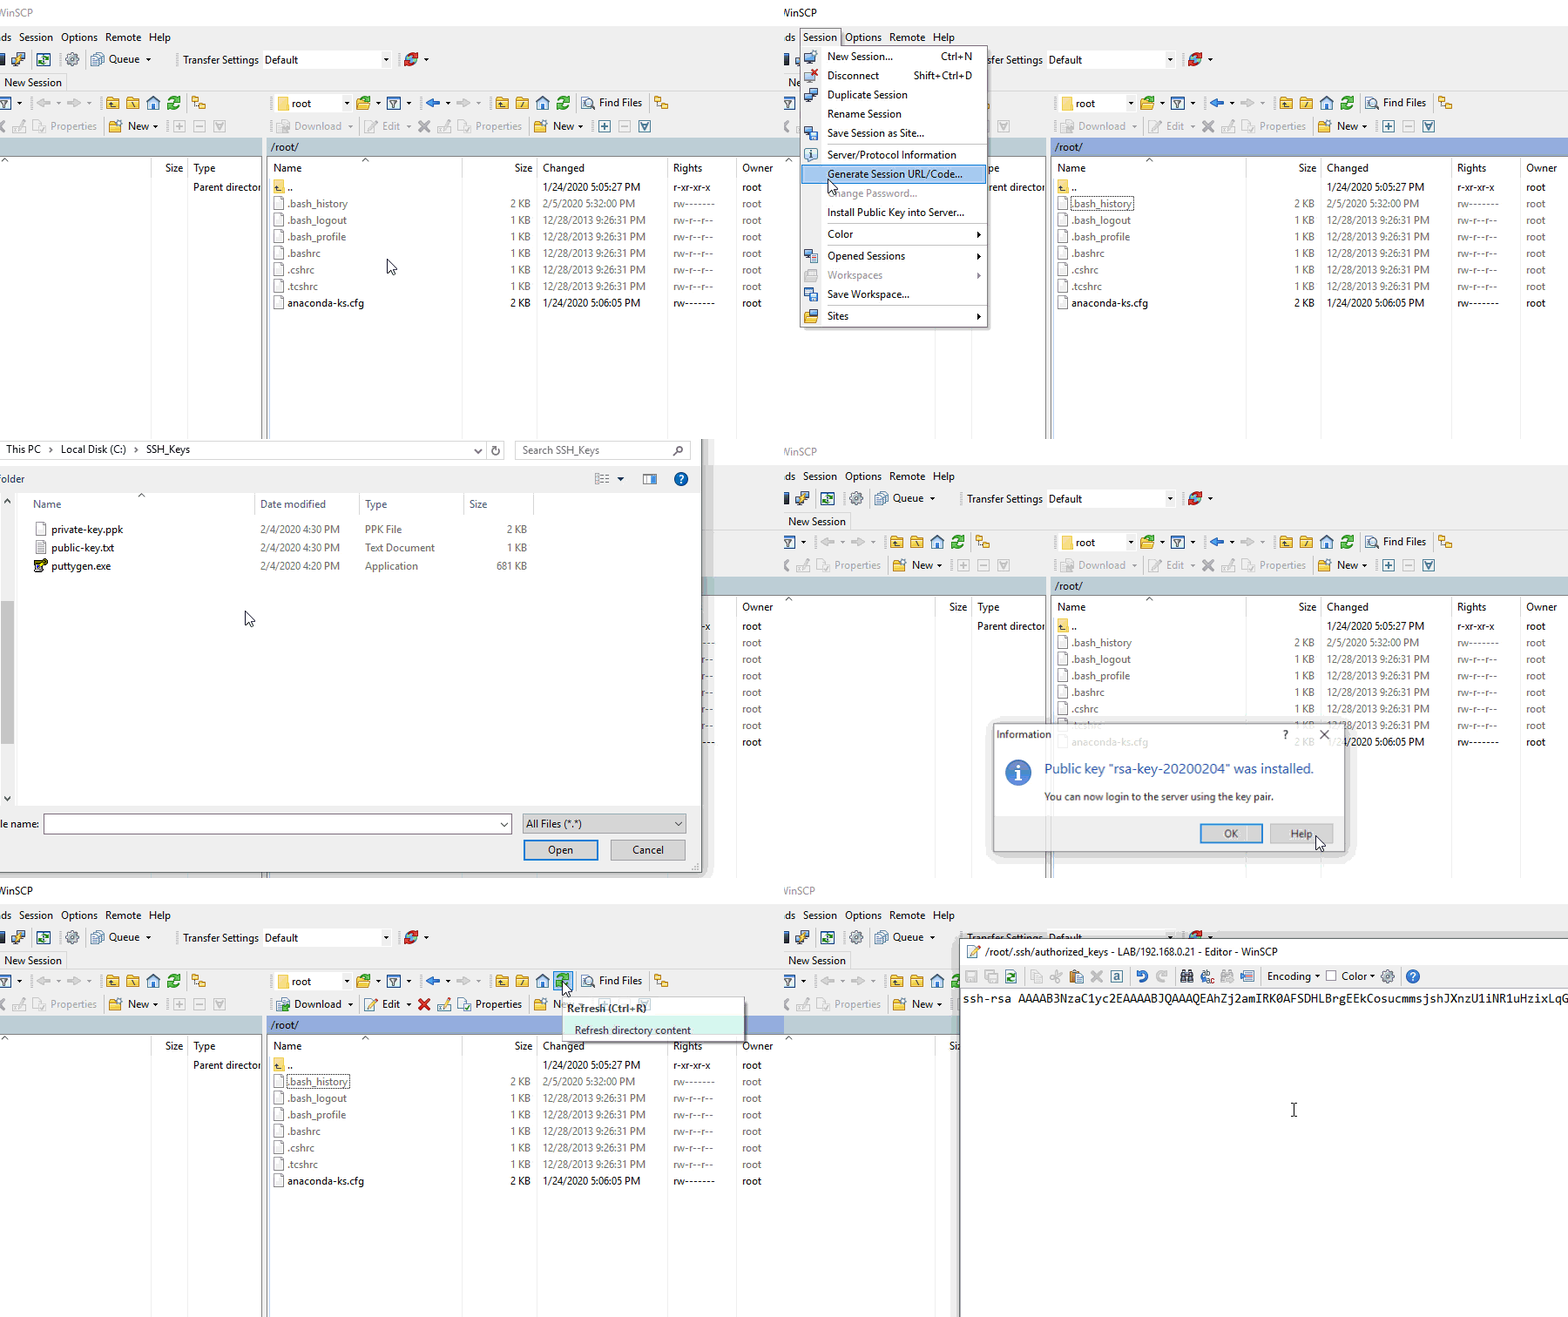
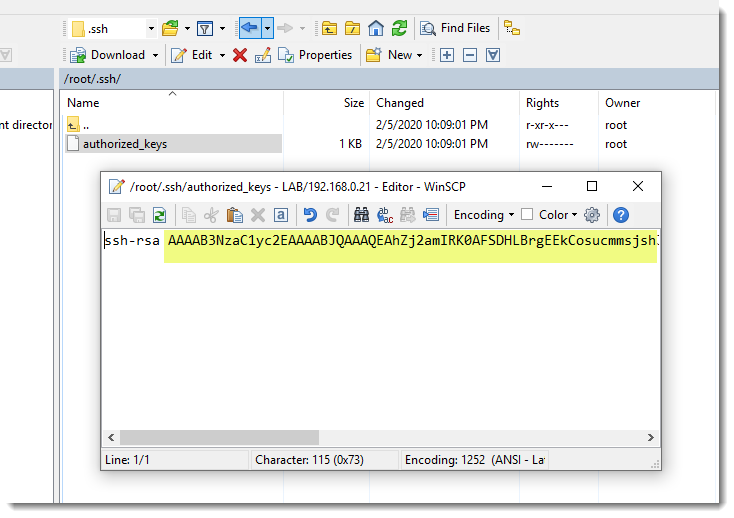
You witnessed how WinSCP with just a few clicks did create the folder(.ssh), the file(authorized_keys), set proper ownership and permissions and not only that it also copied the Public key inside the file and now everything is there ready to be used.
Amazing! wasn’t that terrific! I told you, once you start using WinSCP you automatically fall in love with it.
Step by step screenshots
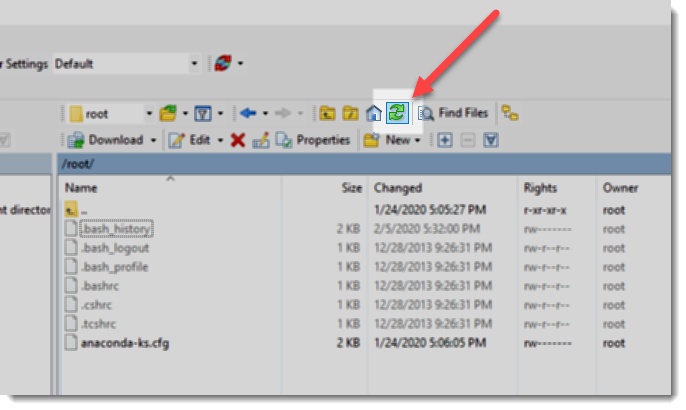
Is the animation a little bit fast and hard to see each step? do not worry, here you are the separated screenshots.
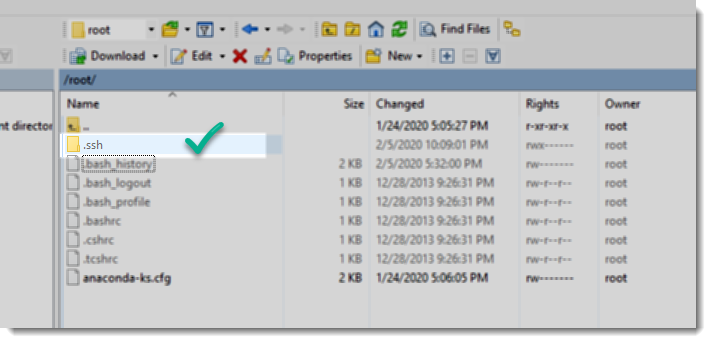
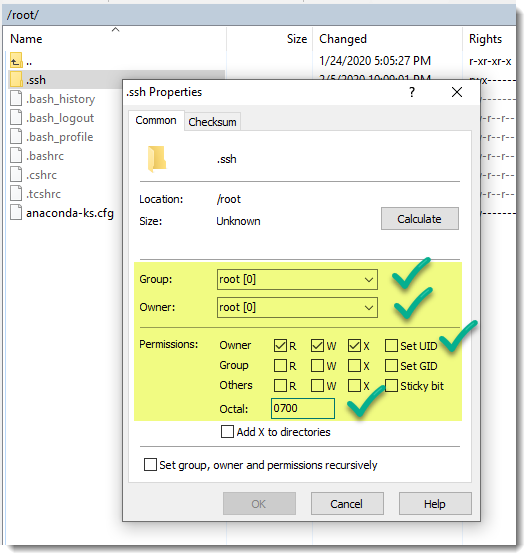
Folder ownership and permissions
In case you want to double check the folder’s security settings, I’m talking about the proper configuration of Ownership and Permissions, go ahead and use the WinSCP GUI to see its properties.
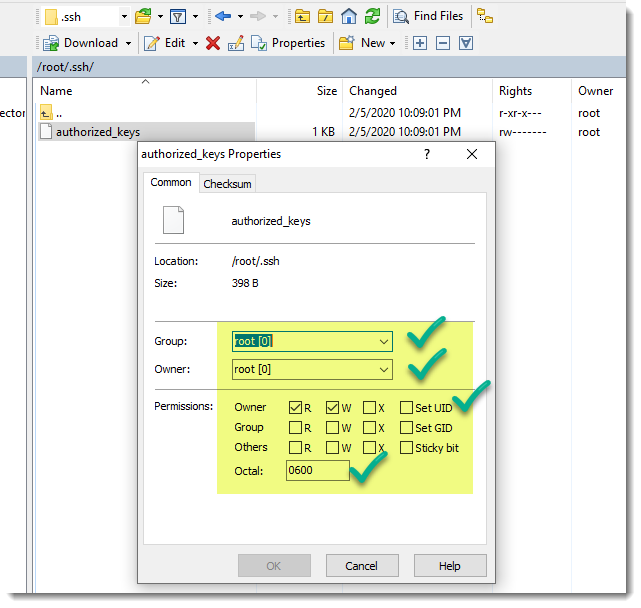
File ownership and permissions
In case you want to double check the file security settings, I’m talking about the proper configuration of Ownership and Permissions, go ahead and use the WinSCP GUI to see its properties.
Did you noticed that not even the “root” account has “executable” permissions over the file, that’s because the content of the file is not executable code written in any programming language, it is instead a bunch of characters representing an SSH key, and that’s perfectly fine because when it comes to permissions we always want to give the absolute necessary and nothing more.
CLI commands
As you saw, the above task was completed almost effortless using WinSCP, but if you prefer to use the terminal here you are the CLI commands you must use to achieve the same results, with the exception that you must use the text editor “vi” to paste the Public SSH key inside the file.
mkdir .ssh
chmod 700 .ssh
vi .ssh/authorized_keys (paste pub key)
chmod 600 .ssh/authorized_keys
exit
Be careful with line number three, the words inside the parenthesis are not part of the CLI command they are there acting as a reminder that once inside the file and using “vi” you must copy the public key from the clipboard and into the file, if you want to learn a little bit more about “vi” you can take a look at this article.
Where to go next?
We can perfectly say that most of the dirty job has been already done, and you are now just a couple of steps from completing the task, I’m talking about the following steps:

