Mapping ISO to VM
Once the following two steps are completed:
You are ready to map the ISO file to your recently created Virtual Machine, this is the last step before proceeding with the actual installation of your guest OS, in our case CentOS 7.
How to map the ISO to the VM?
As you’ll see the ISO file must be mounted (digitally inserted) as it is an optical disk, yes one of those no longer used CD-ROMs.
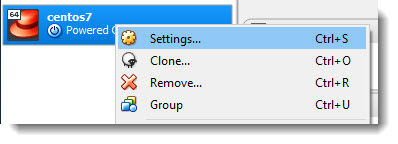
Right click on your VM and select “Settings“, see screenshot below:
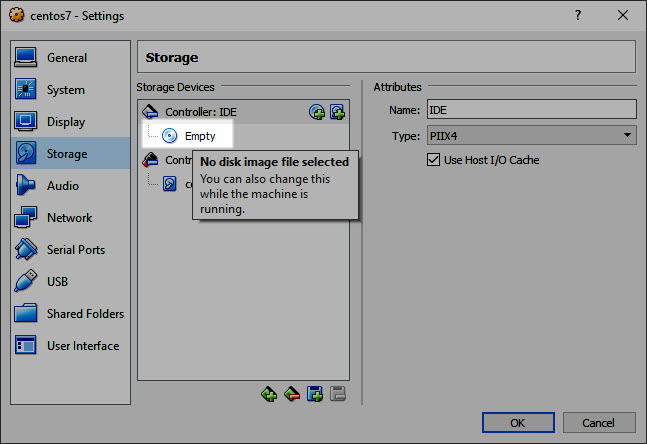
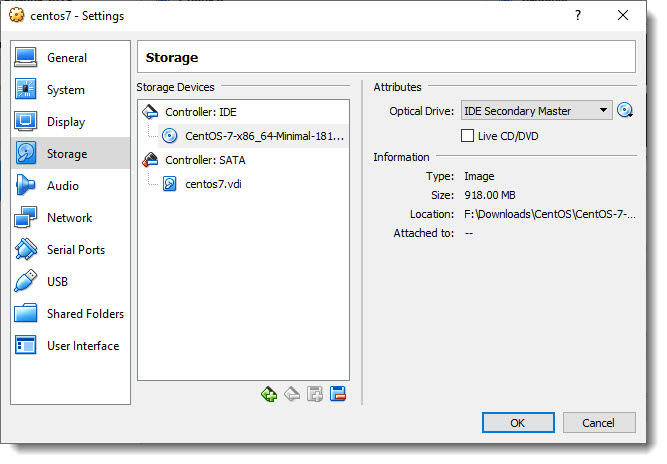
In the “Settings” screen select “Storage” and then click the small CD icon where it says “Empty“, see screenshot below:
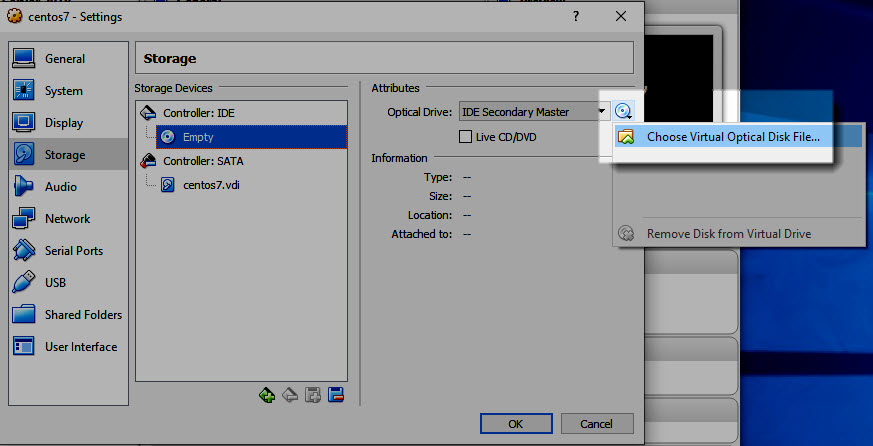
Now go to the “Optical Drive” selector, another small CD icon in the rigth side of the screen, and select “Choose Virtual Optical Disk File“:
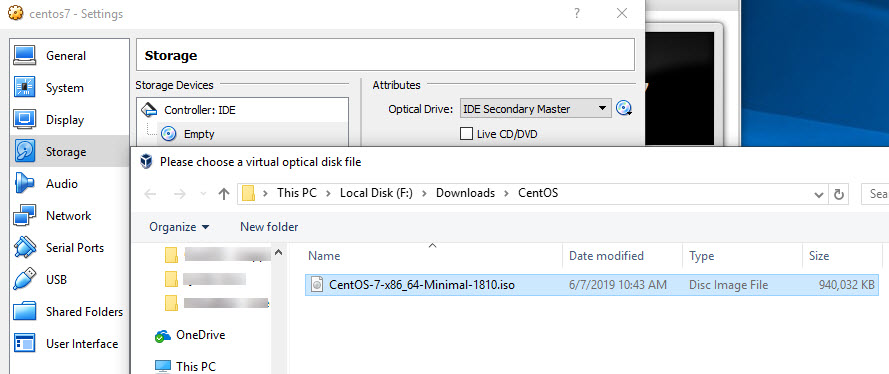
Navigate the folders on your computer until you reach the one where the ISO file is located.

And that’s it, your ISO file is now mapped to your Virtual Machine.
The next step
You are ready to the next step, that would be to start the installation of your guest OS.

