WordPress Permalinks
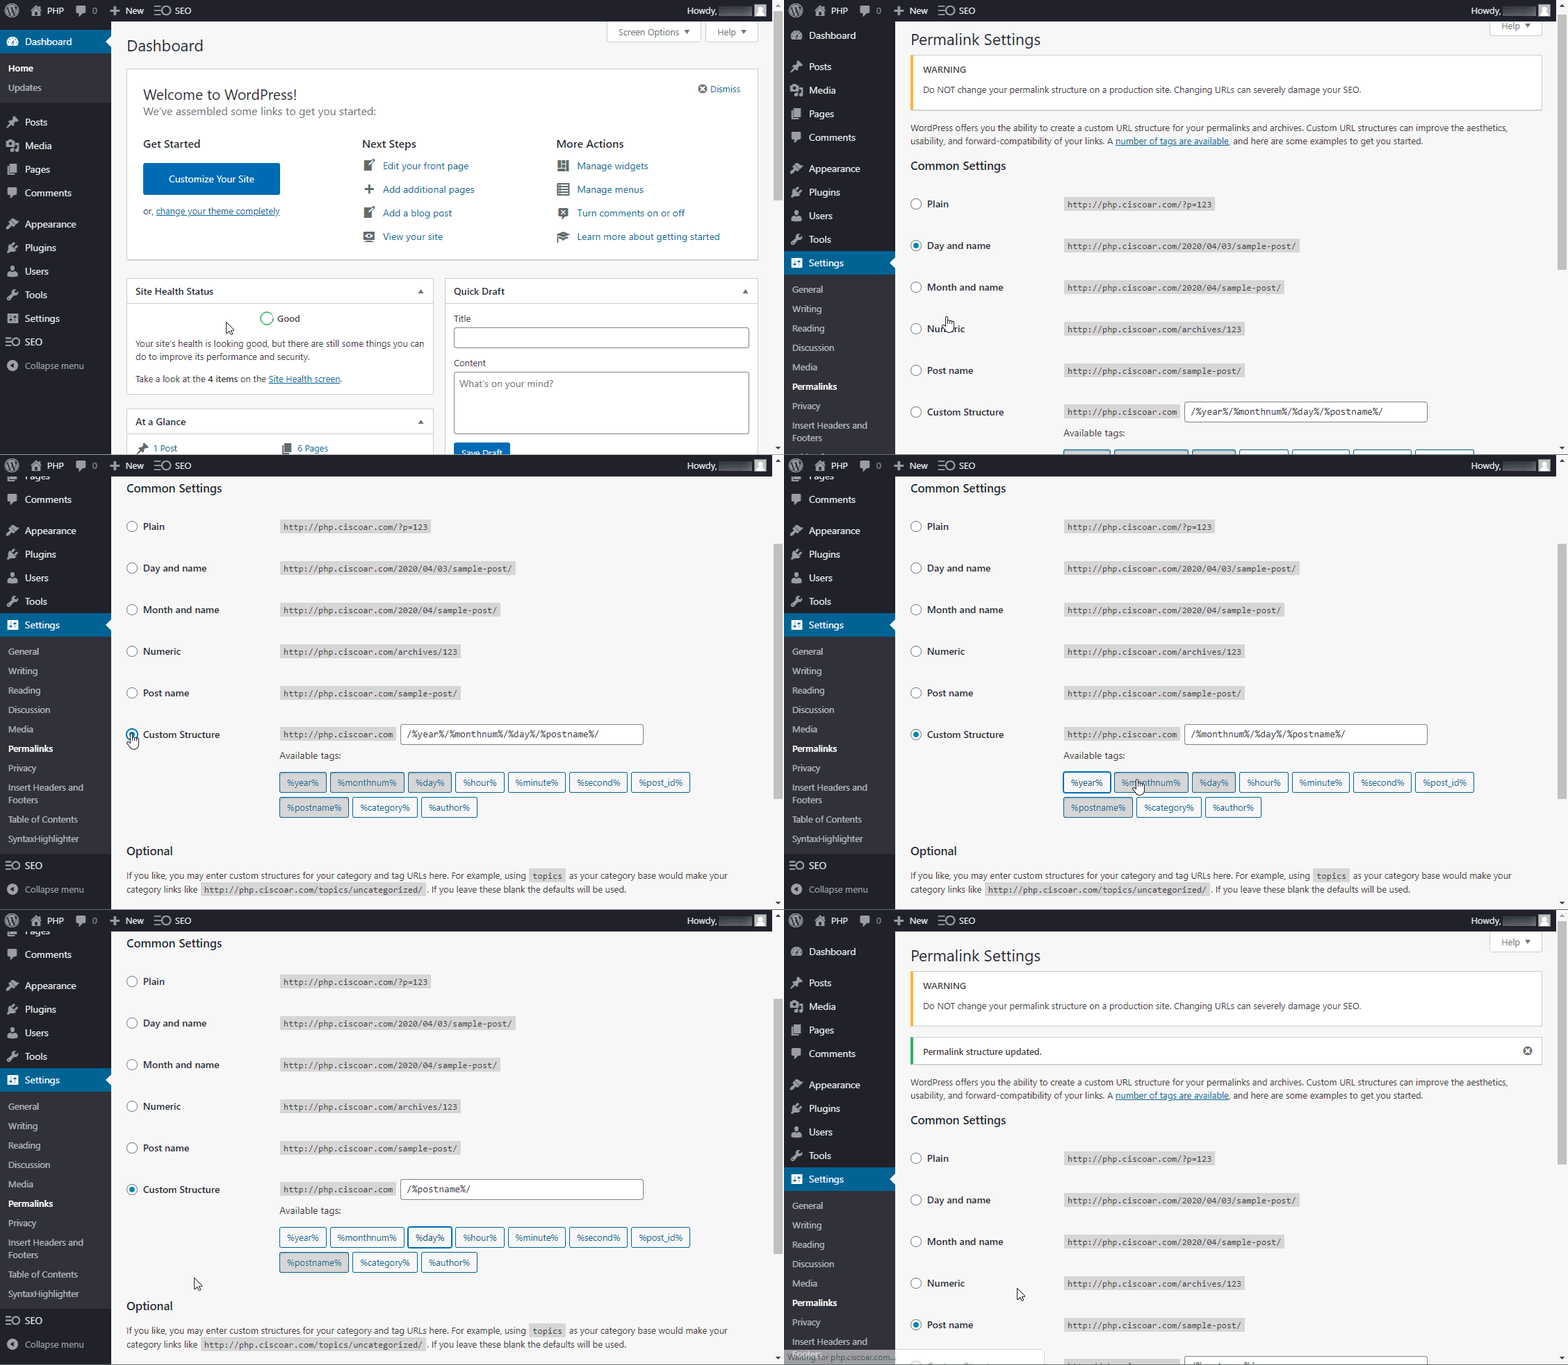
Having index.php in your WordPress website URLs doesn’t add any value to your visitors, it’s always better to have URLs as short as possible, we don’t want to distract our readers.
This change must be done immediately after your website goes online to make sure your site is indexed by search engines using the correct URL, the following animation shows you how to configure permalinks on WordPress.
Permalinks common error
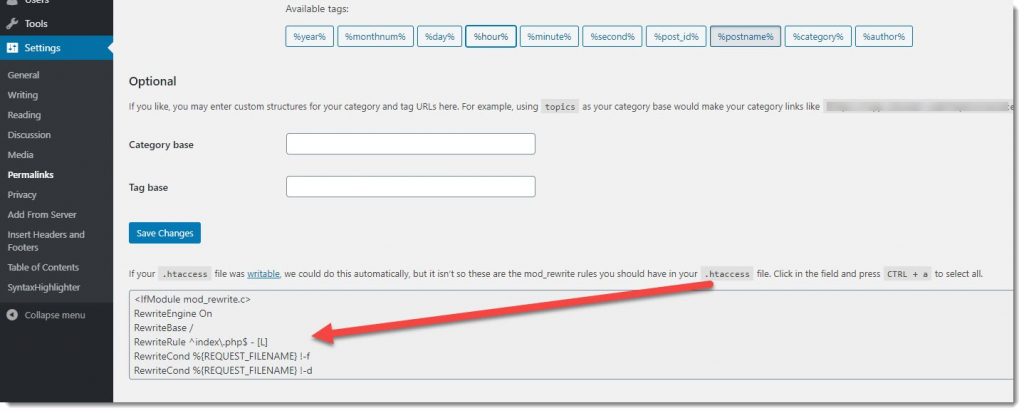
If the above steps don’t make any effect in your URLs, and you get instead the following message, that means you’ll have to configure your Apache web server before being able to modify the WordPress permalinks.
WordPress Directives
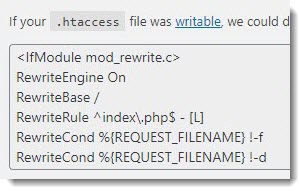
The below image is just a zoom of the image above acting as an spotlight over the WordPress directives that have to be included in the “.htaccess” file.
Step 1 – Enable mod_rewrite
This particular topic was covered in the following article, feel free to go over it if you want to learn how to enable Apache mod_rewrite.
Step 2 – Enable .htaccess
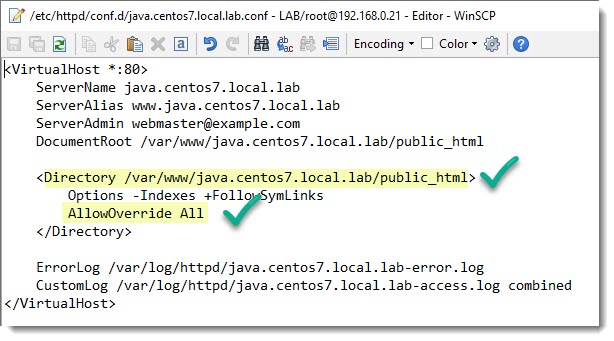
Be sure your Virtual Host file is configured as shown in the following image.
I’ve highlighted the two lines that will enable new rules included in the “.htaccess” files to be applied.
Step 3 – Copy and Paste the WordPress directives
As you’ve probably noticed, WordPress has already prepared the directives for us, they start with the tag “BEGIN WordPress“, and after a few comments (the lines which start with the pound symbol #) you’ll find the rules inside the IF module, immediately after the closing tag of the IF module you can see the “END WordPress” comment, see image below.
# BEGIN WordPress
# The directives (lines) between `BEGIN WordPress` and `END WordPress` are
# dynamically generated, and should only be modified via WordPress filters.
# Any changes to the directives between these markers will be overwritten.
<IfModule mod_rewrite.c>
RewriteEngine On
RewriteBase /
RewriteRule ^index\.php$ - [L]
RewriteCond %{REQUEST_FILENAME} !-f
RewriteCond %{REQUEST_FILENAME} !-d
RewriteRule . /index.php [L]
</IfModule>
# END WordPress
Step 4 – .htaccess file location
This file is located in the root folder of your website, if the ownership and permissions are configured properly, then WordPress shouldn’t have any problem to write the “.htaccess” file automatically.
/var/www/example.com/public_html/.htaccessStep 5 – .htaccess ownership and permissions
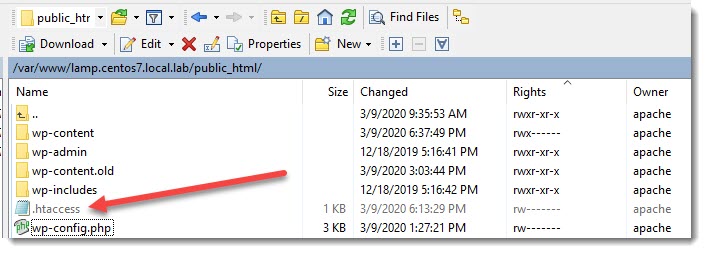
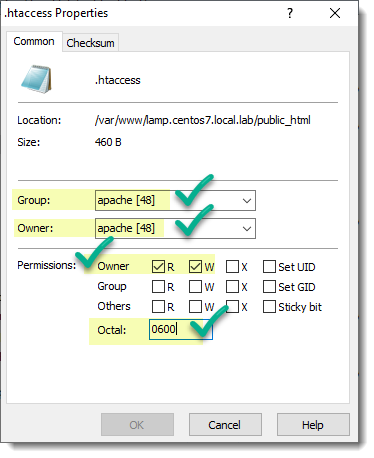
If you followed the best practices about Ownership and Permissions for the .htaccess file, your file must look like in the following screenshots.
From the CLI you can use the list command as follow:
ls -la .htaccessUsing the GUI provided by WinSCP you must see the following.
Problem solved
That’s it, if mod_rewite is enabled and both the virtual host configuration file and the .htaccess file ownership and permissions are configured correctly, then WordPress will take care of everything creating the rules and also applying them, every time you decide to change your website permalink settings.

