Manual backup vs plugin
As you can imagine there are a lot of useful plugins to help you on the task of making a backup of your WordPress website, as always we do have pros and cons when using plugins, in my case and for this particular task I prefer to make backups manually, so, if you are someone like me who likes to have full control and also have proper knowledge of Linux, then feel free to go over this article to learn how to do a manual backup.
Backup and restore
Most of you will be happy just having the backup saved into your preferred storage device, but some of you may also want to restore the backup on a local LAB, and that’s in my opinion the best aproach because then you have a local copy of your website running as the best way to verify that your backup is good.
Restore to Windows vs restore to Linux
If you plan to restore the backup on a Windows machine, let’s say you are running WAMP then you don’t have to worry for the ownership nor for the files and folders permissions, but if you plan to restore the backup on a local Linux Virtual Machine then be sure you use tar and gzip, to keep both ownsership and permissions.
Manual backup
WordPress Manual backup is quite easy, basically you compress the wp-content folder along with the database (.sql) file, and that’s it!.
WordPress manual backup
Which tools are needed?
To be able to perform a manual back first of all you need an account with “sudo” privileges, also access to phpMyAdmin with proper rights, and finally an FTP tool to download the compressed file to your local machine, we are going to use WinSCP for that.
Step 1 – Use phpMyAdmin for database backup
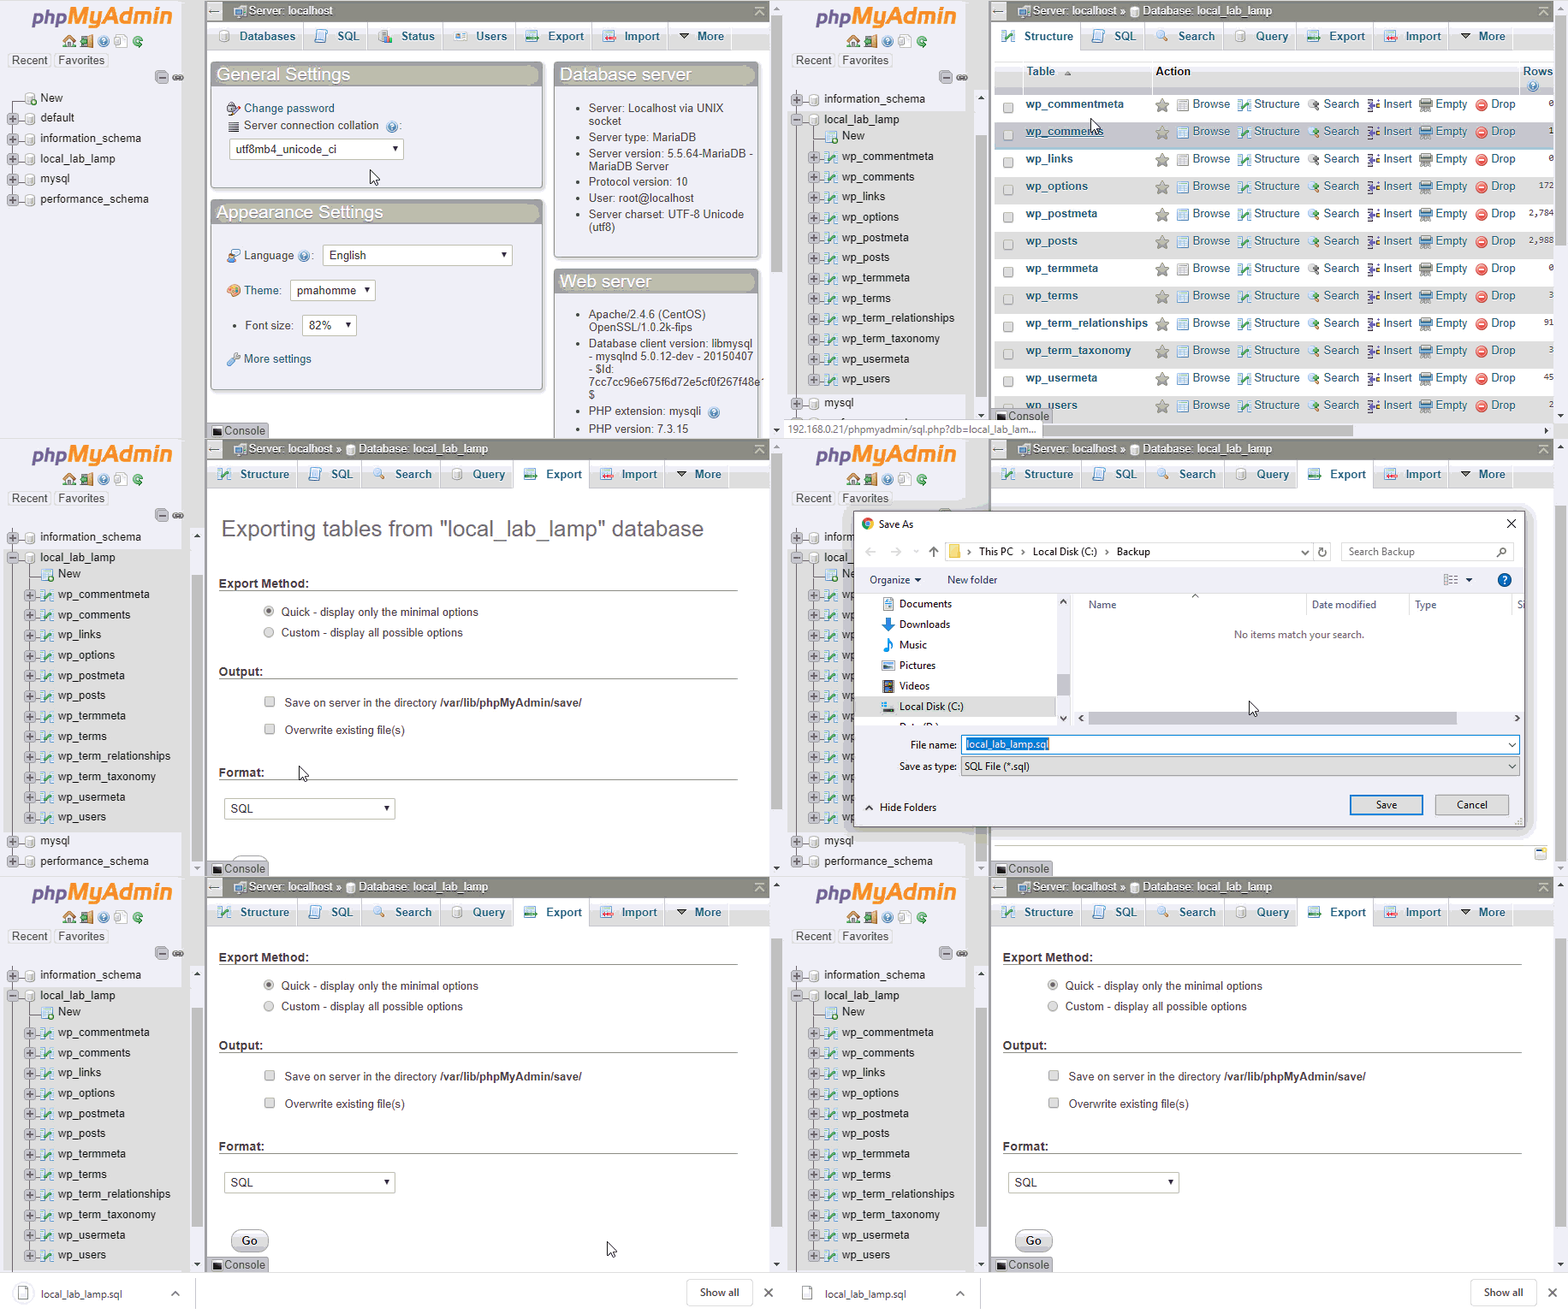
The follow animation shows you how to do a MariaDB (mysql database) backup using the GUI provided by phpMyAdmin.

Step 2 – Compress “wp-content” folder
This backup will be restored on a local Linux Centos 7 virtual machine where WordPress has been installed, and where the Theme Twenty Seventeen was activated, nothing else has been done, so, the website is empty, that’s the reason why we’re going to use tar & gzip to create a compressed file which preserves the ownership and permissions settings.
Once you are located in the root folder of your website, you can run “tar” as shown below.
tar -cf bkp-wp-content-folder.tar ./wp-contentUse the CLI command below to see the size of the “.tar” file.
ls -lha bkp-wp-content-folder.tarAs you can see the size of the “.tar” file is 119 Mb
Once the “.tar” file is created you can compress it using for example “gzip” that comes with CentOS 7 by default.
gzip bkp-wp-content-folder.tarCheck now the size of the compressed file, it must be considerably less than the “.tar” file.
ls -lha bkp-wp-content-folder.tar.gzAs you can see the size of the compressed file is 103 Mb, keep in mind that the compression algorithm do their best job over text/code files but it can’t do much with images, so if your website has several images the compression step won’t reduce the file size as much as you may want.
Now that you know the theory behind you can complete both steps, tar and gzip using only one CLI command, see below:
tar -czf /var/www/bkp-wp-content-folder.tar.gz *And when you want to extract all the files and folders inside the .tar.gz file you can use the following CLI command.
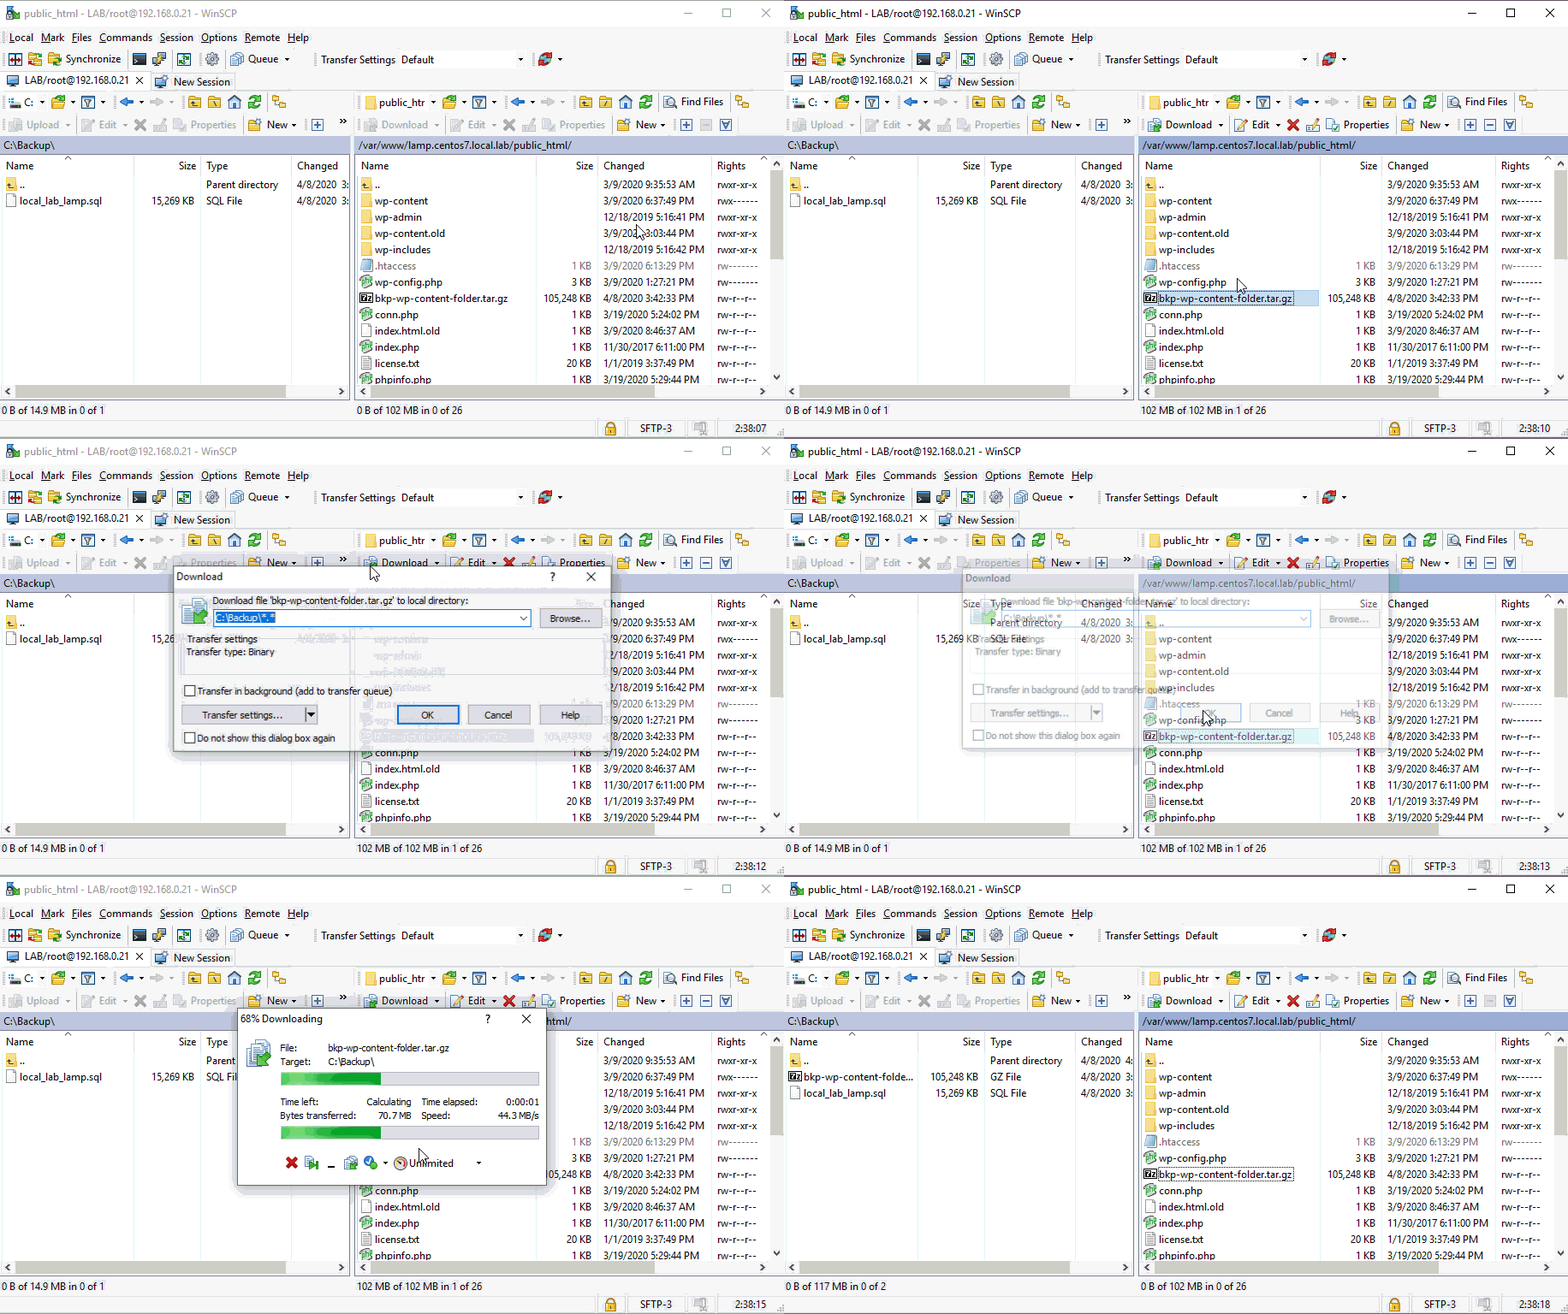
tar xvzf bkp-wp-content-folder.tar.gzStep 3 – Download compressed file (.tar.gz)

Where to go next?
That’s it! your WordPress website backup is completed, in case you want to learn how to restore this backup on a local machine, then you can take a look at this article.


