How to disable DHCP on Linux CentOS 7 using WinSCP
We’ve already discussed about the why it is needed to disable DHCP in this article, let’s move forward and complete this important task.
It is quite probably that you’re going to find many tutorials about changing the DHCP settings using one of the widely used and very well-known text editors, “vi” or “nano”, if so, if you already know how to do it from the CLI then you can enrich your knowledge with this article because we’re going disable DHCP using the 100% GUI(Graphical User Interface) that’s provided by WinSCP.
Network Script location
The small text file containing all the Network settings is located in the following folder:
/etc/sysconfig/network-scripts
You can take advantage of the WinSCP’s bookmarks to go directly to that folder, see animation below, if you want to learn how to create a bookmark on WinSCP please take a look at this article.
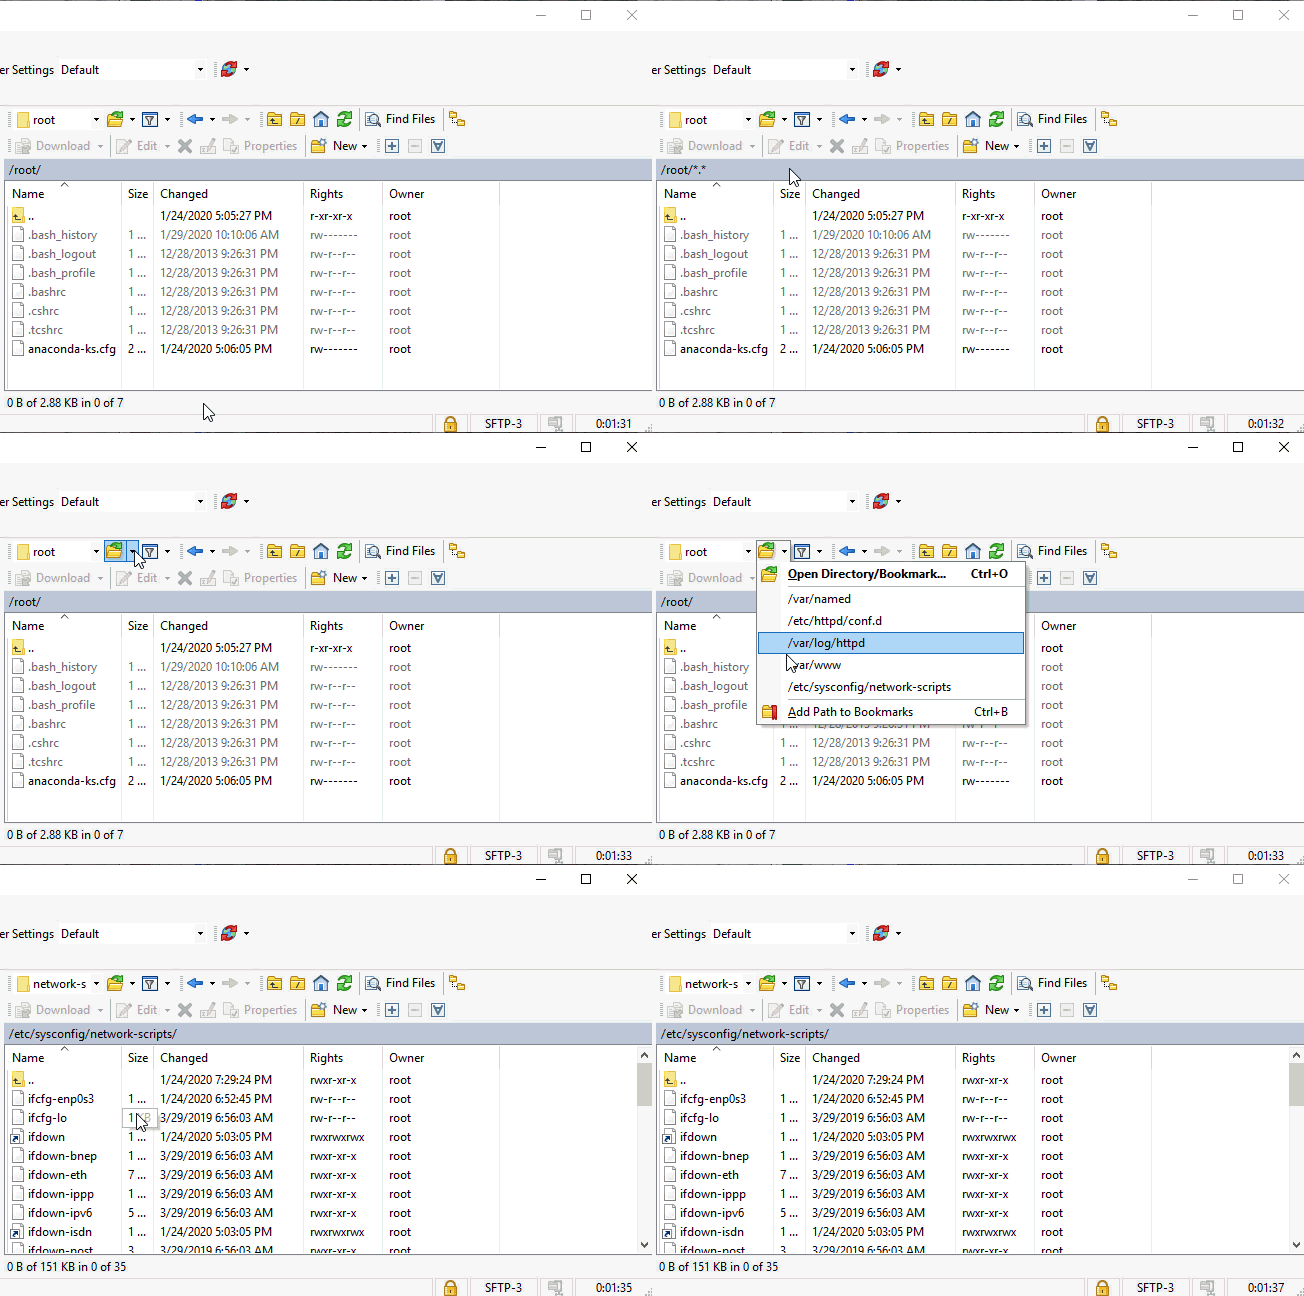
Network script name enp0s3
If you want to know which text file contains all the network settings you can take a look at this article where we discussed about the Network Adapter and how to check the IP Address that was automatically assigned by DHCP.
How to open the network script
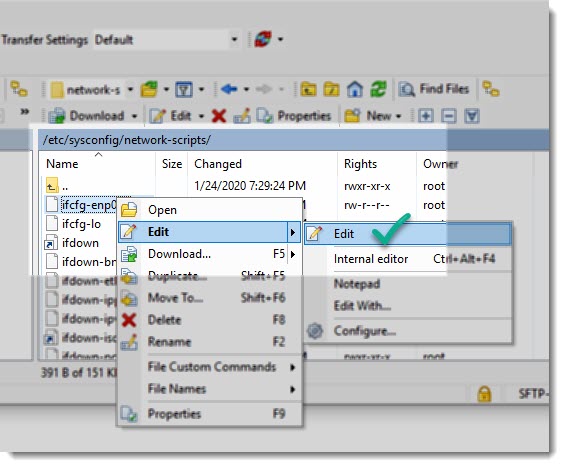
WinSCP allow us to open text files using both an internal editor (default option) or the text editor of your preference, in this case we’re going to use the one that comes by default.
If you want to accelerate a little bit the opening on a text file you can just double click and the default text editor will be used to open the file.
Network script example
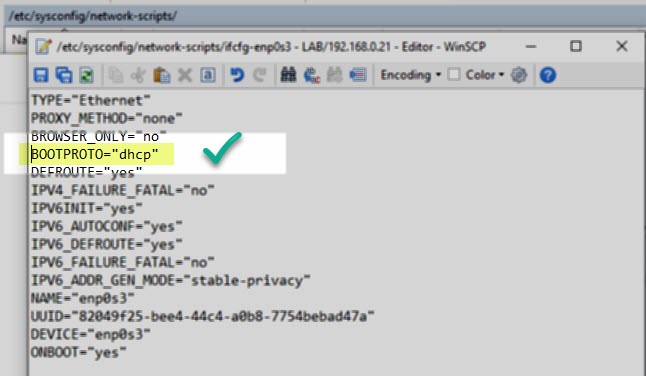
The following image shows a typical network script, as you can see it’s just a text file containing all the parameters related to the Network, in particular we’re going to change the Boot Protocol, see image below.
What needs to be changed?
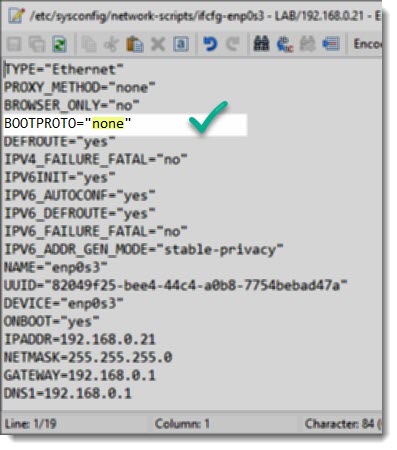
The first thing we want to change is the BOOTPROTO line, we must replace “dhcp” with “none” that simple step will tell the system that DCHP will no longer be used for this particular network adapter.
What needs to be added?
Now that DHCP was disabled we must manually tell the system which IP addressing it must use for this particular network adapter, here you have the typical settings for a home network, you can always double check these settings on your Windows machine to be sure everything is ok, take a look at this article.
IPADDR=192.168.0.21
NETMASK=255.255.255.0
GATEWAY=192.168.0.1
DNS1=192.168.0.1
DHCP is now disabled
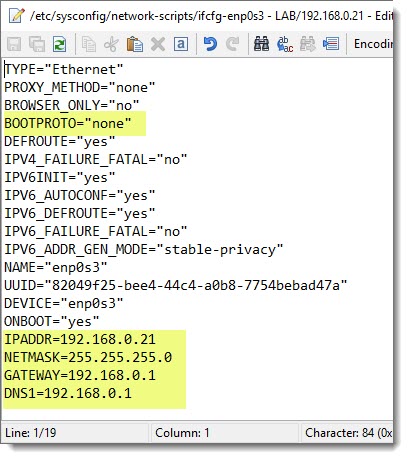
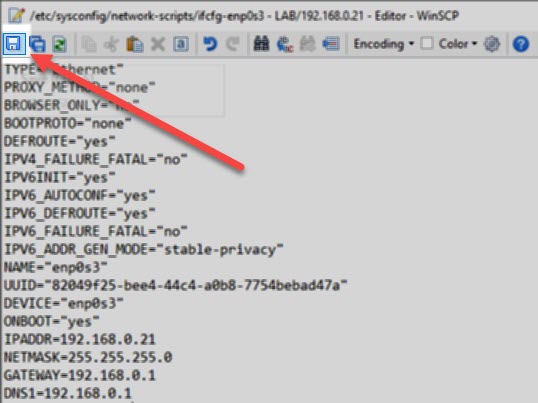
Once you’ve completed the needed changes, the final version will looks like the following image, I’ve highlighted the lines that were changed or added.
Close the text file saving the changes
Save the file as usual, just click the little icon shaped as a floppy disk located at the upper left corner, see image below, and then feel free to close the window.
Restart the Network and check connectivity
The final step, as you can imagine is to restart the network, I’ve already told you that we are going to use both methods, the CLI and the GUI, well this is the perfect moment to use the CLI, we can restart the network using the following CLI command.
systemctl restart network.service
This step must be done either by the super user “root” (usually in a LAB Environment) or with power user with “sudo” privileges (real world scenario).
Immediately after restarting the network be sure that connectivity is still working as it should, for that you can take a look at this article.

