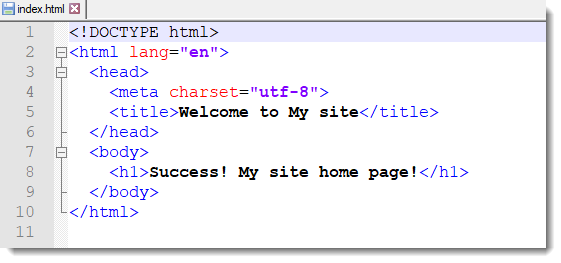
The HTML code of a simple webpage
In order to be able to test our Apache’s Virtual Host, we’re going to need a simple web page, the simplest one, see the following screenshot:
A simple webpage as seen by visitors
Once all the configuration is done the html code will be recognized and the browser will show the following web page.
Just in case, if you need the “index.html” file, you can download it from here.
Copy the HTML code
If you want to copy the HTML code and create the file using a text editor, let’s say “vi“, then here you are the code.
<!DOCTYPE html>
<html lang="en">
  <head>
    <meta charset="utf-8">
    <title>Welcome to My site</title>
  </head>
  <body>
    <h1>Success! My site home page!</h1>
  </body>
</html>
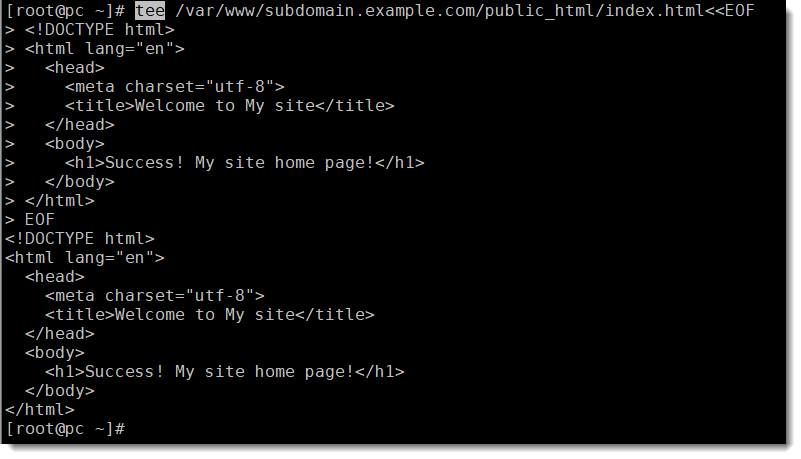
Create index.html using the Tee command
From the CLI you can save time and effort when creating the “index.html” file, you don’t have to open a text editor, paste the code, and save it to then be ready to upload it to the root folder of your website, using the Tee command we’re going to do all these tasks in only one simple step, just copy the following command and paste into the terminal.
tee /var/www/subdomain.example.com/public_html/index.html<<EOF
<!DOCTYPE html>
<html lang="en">
  <head>
    <meta charset="utf-8">
    <title>Welcome to My site</title>
  </head>
  <body>
    <h1>Success! My site home page!</h1>
  </body>
</html>
EOFThe index.html file is just an example, a test file, once Apache recognizes it you can be absolutely sure that you are ready to start building your website either from the scratch using programming languages like HTML, JavaScript, CSS, PHP, etc. or taking advantage of one of the multiple CMS (Content Management Systems) available these days, a good example of one of them, and by the way the most commonly used would be “WordPress“.
Ownership and permissions
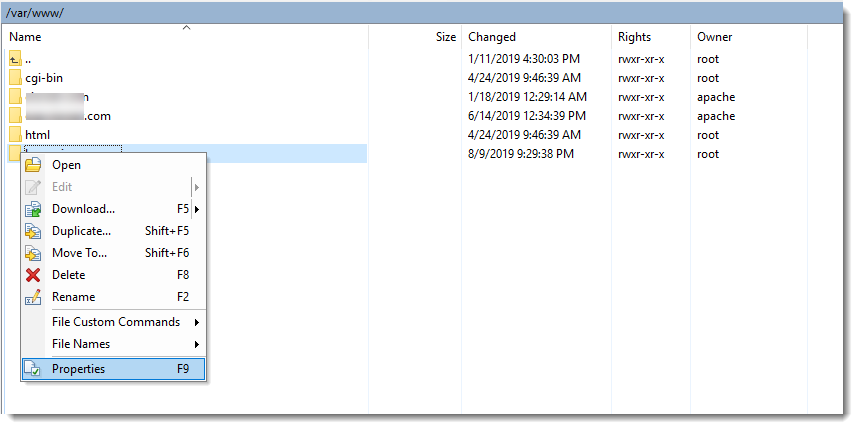
Now that we have the directories and also the “index.html” file in place, we can take care of the Ownership and Permissions, as you can imagine both, files and folders, have to be prepared for Apache to be able to read them and show them to visitors.
We can accomplish that task either using the CLI or using WinSCP, let’s see how it is done using the GUI provided by WinSCP.
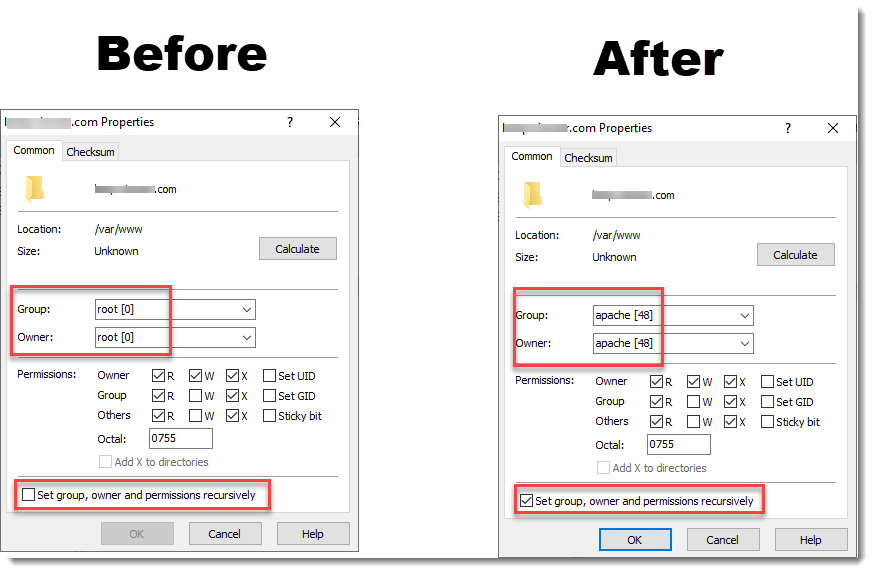
Both Owner and Group must be changed to “Apache”, see screenshot below:
Be sure to put the check in the checkbox located at the bottom, where it says that owner and permissions will be set recursively, that means that not only the current folder will be configured but also sub-folders and files inside them, all at once.
When it comes to “Permissions” as you can see in the above screenshot only “the owner”, in this particular case, “only Apache” will be able to Read, Write, and Execute the files, while both the group and others, they will be able to Read and Execute but not to Write (modify) the files, this configuration is represented by the Octal 0755.
Apache isn’t in the drop down list
If you are configuring the Ownership via WinSCP for the first time you won’t see Apache in the drop down list, in this case you must change it via the CLI using the following command.
chown -R apache:apache /var/www/*Apache Config Test
Let’s see if the changes we’ve made so far have been recognized by our Apache and if so we’d like to know that everything is fine, and for that purpose we can use the following CLI command.
- apachectl configtest
If the outcome of the “apachectl configtest” command is “Syntax OK” you are good to go.
Restart Apache
Now that we know our changes do not affect Apache we can do a restart and then check the status.
- systemctl restart httpd.service
- systemctl status httpd.service
Where to go from here?
Now that we have folders and files in place and the ownership and permissions have been configured, we can start working with the Domain name, here we have two possibilities, those of you working on a LAB environment can use the “hosts” file to add a new local domain name, or those of you working on a real life scenario can go to Digital Ocean (or your preferred hosting provider) to configure the DNS entries there.
- LAB scenario – add local domain into the hosts file
- Production scenario – Digital Ocean domain settings


