Mapping SSH Private Key on SecureCRT
You’ve reached the last step on the configuration of SecureCRT to start using the Public Key Authentication method when connecting to a remote server.
How to map the Private SSH Key on a SecureCRT session
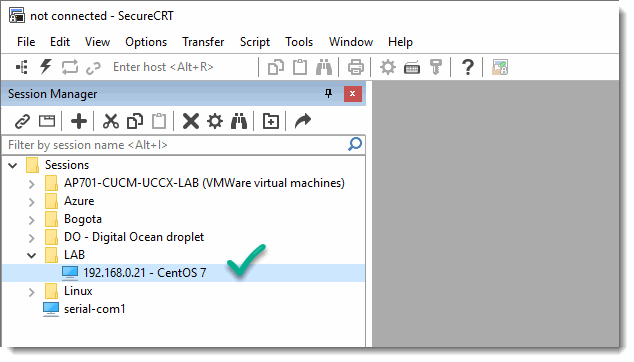
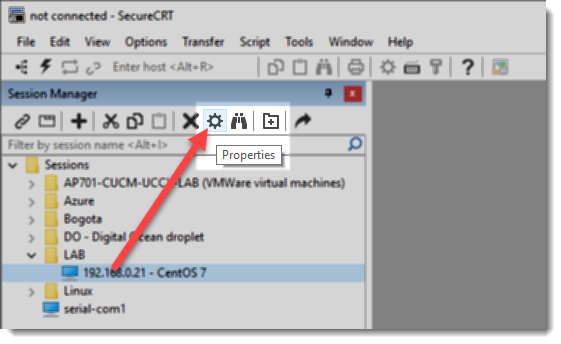
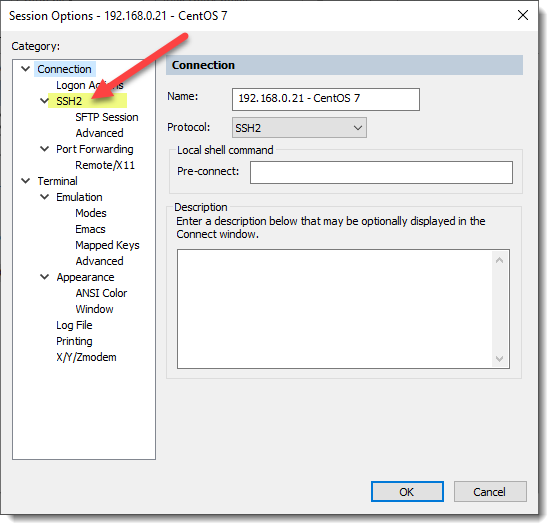
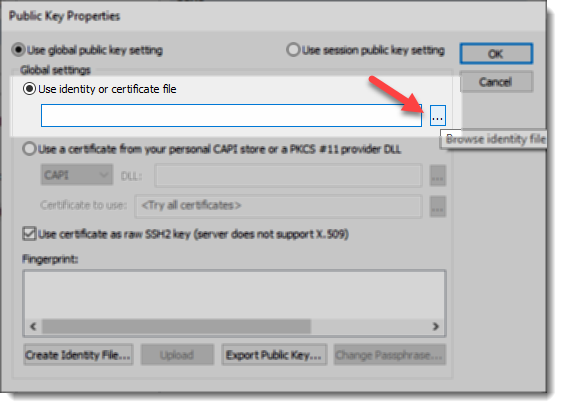
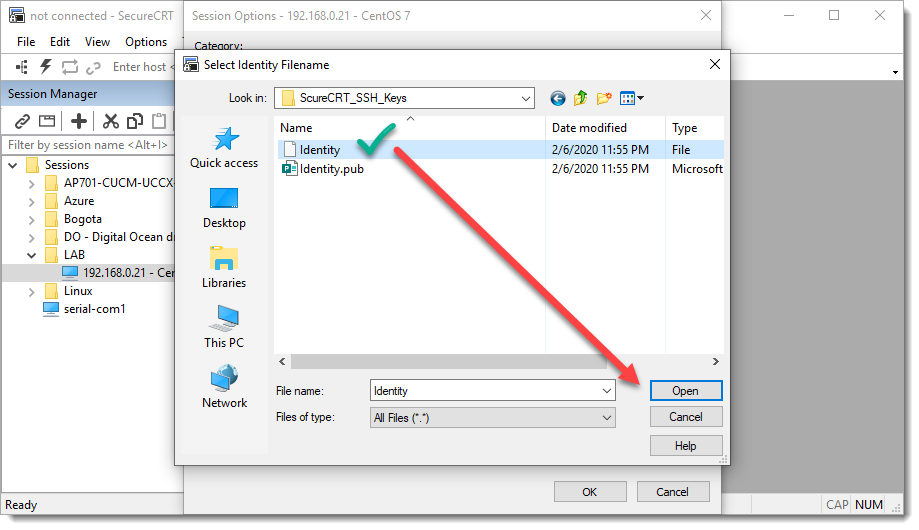
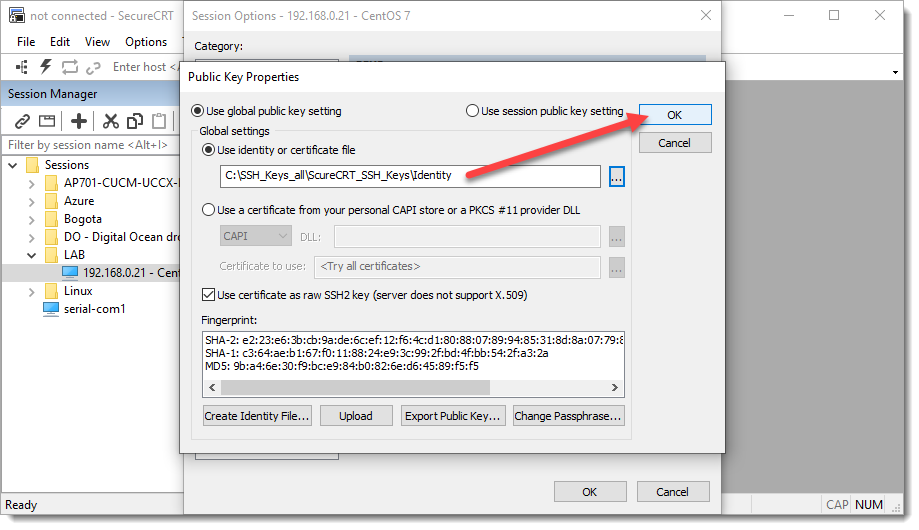
The following animation shows the steps you must follow when mapping an SSH Private Key to an existing session, the same steps can be followed if you are creating a brand new SecureCRT session.

Step by step screenshots
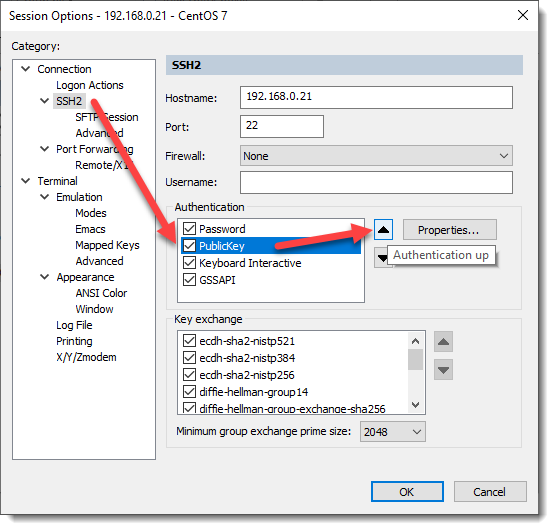
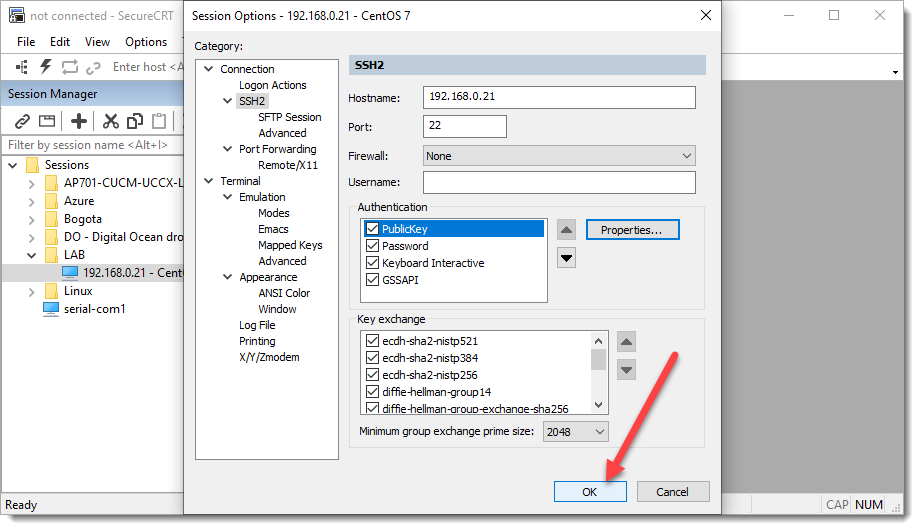
As always we’re including each and every screenshot for you to see the taken steps in more detail.
This step is important because is telling to SecureCRT that from now on the first Authentication method to be used for this particular session must be the Public Key Authentication, and the password method will be left as the second option.
Where to go next?
Congratulations! Your SecureCRT session is now ready to use the Public Key Authentication method to login into your remote server.

